Organizing Custom Media
To simplify the adaption of the media to the target production stock, you can organize your custom media in the separate Media library (Database > Media). You can easily create new media, edit the paper tint or other media properties of existing media, and clean up unused media.
To create a new custom medium from a spectral measurement file, you can click the New Media button and then click the Import button on the Tools & Actions pane to load the measurement file.

If you just want to change the paper tint or media properties (without measuring), you can open a project that is already using the medium you want to customize, open the Color Corrections dialog box from the Tools & Actions pane, and click the Save to Database button (see "Correcting the Paper Tint and Creating a Custom Medium").
The screenshot shows the settings you can edit.
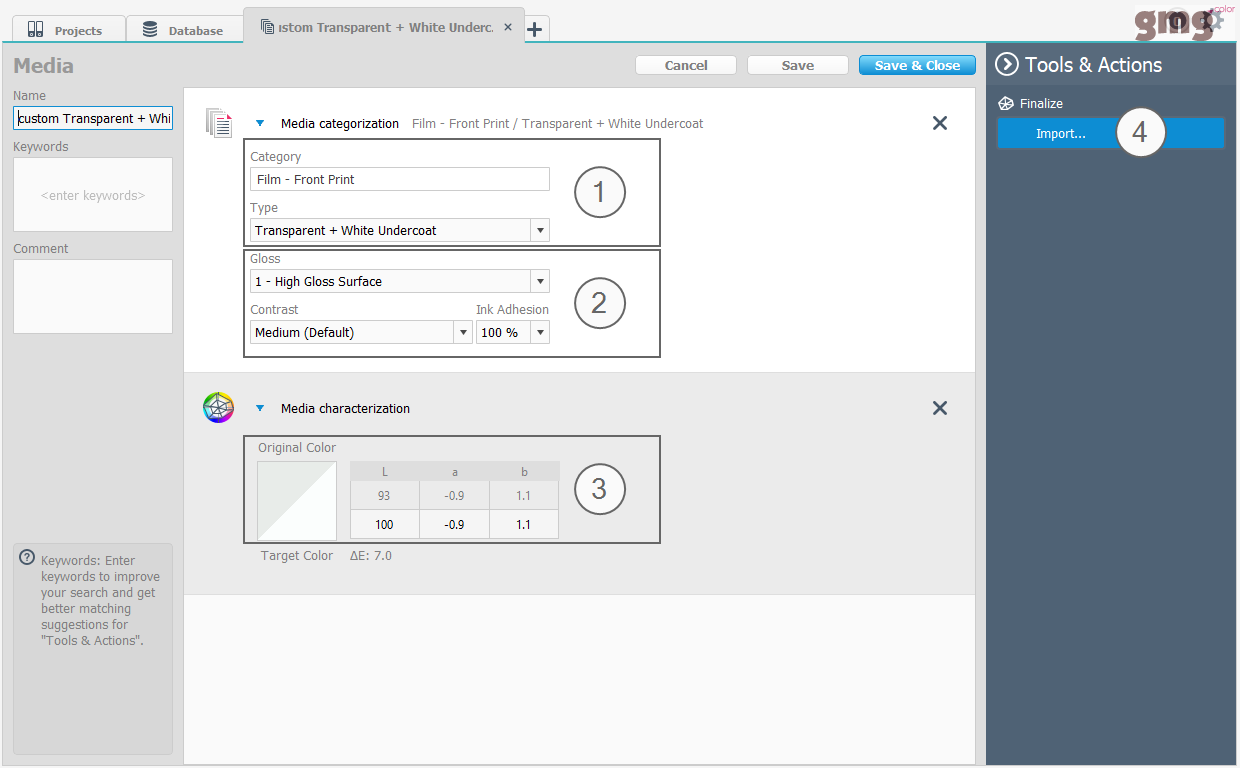
| 1 | Media Category and Media Type. These settings will be used as a classification of media. When selecting a medium in a project, you will see only media of the same Media Category and Media Type in the list. |
| 2 | Media properties that will affect the profile. |
| 3 | Paper tint. You can change the original paper tint (from the measurement/characterization) to a new target value (from the production stock). |
| 4 | You can import a new spectral measurement file to define the medium. The application will read out the paper tint from the measurement and update the original paper tint. |
All projects referring to a changed medium will be updated automatically as well. This does not only save time and makes your life easier, but also ensures consistent paper tints across your projects and thus that the correct paper tint will be used in the proof.